Linux Print
A basic ability for each Linux user is to print from the Linux command line. The Printing from the Linux Command Line offers a strong and adaptable approach to communicating with your printer, regardless of whether you need to print papers, reports, or labels. We’ll look at the procedures and commands required to print documents from the Linux command line in this article. We’ll go over how to configure printers, install required software, and complete print jobs.
Linux lp and lpr command:
The system commands for printing files are provided by CUPS (Common Unix Printing System). It also provides a number of common settings for managing the print process. Now let’s look at printing files.
How to print files in Linux:
Use the lp and lpr commands to print files from the Linux terminal. The default printer will be used to print the file. Carry it out as follows:
- lp < file name>
- lpr <file name>
The above commands will print the specified file.
Choosing a Printer:
You may select which printer to use to print the specific file if our system is connected to many printers. There are several ways to connect these printers, including networking, USB ports, parallel, and serial connections.
To get a list of all the printers that are connected, use the following command:
- lpstat -p -d
You may see a list of available printers by using the command above. A list of the printers may be viewed with the ‘-p’ option, and the default printer can be specified with the ‘=d’ option.
Use the lp command and the ‘-d’ or lpr command and the ‘-P’ options to print a file to a specified printer. Take a look at these commands:
- lp -d <printer name> <file name>
- lpr -P <printer name> <file name>
In the above commands, both commands will perform the same operation.
Setting Up a Demo Printer:
CUPS (Common UNIX Printing System) will be used to set up a false printer. The majority of Linux distributions utilize this openly accessible printing layer as the industry standard for managing printers. See how to set up and install the Ubuntu CUPS server.
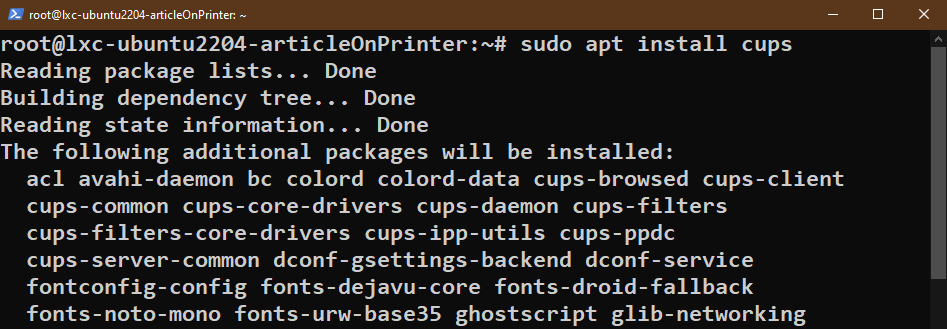
1. Installing CUPS
First, install CUPS using APT:
$ sudo apt install cups
Next, enable and start the CUPS service:
$ sudo systemctl enable –now cups

2. Creating a Dummy Printer
Now, create a dummy printer that prints to /dev/null:
$ sudo lpadmin -p demo-printer -E -v file:///dev/null

If the action is successful, it appears on the list of printers:
$ sudo lpstat -s

Optionally, we can mark our new printer as the default printer:
$ sudo lpoptions -d demo-printer
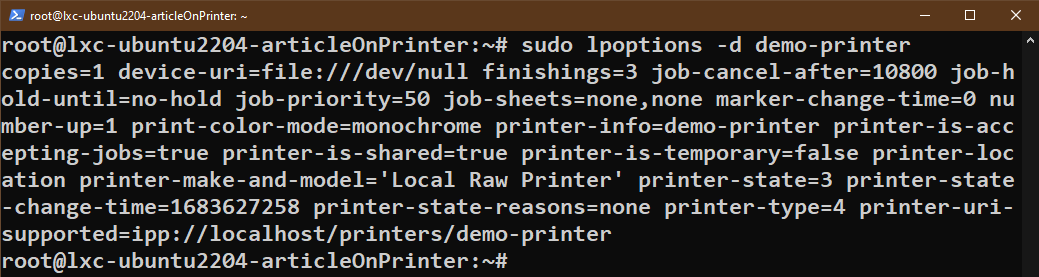
Table of Contents:
- Identifying Your Printer
- Installing Printer Drivers
- Setting Up Your Printer
- Printing Text Files
- Printing PDF Files
- Printing Images
- Managing Print Queues
1. Identifying Your Printer
You must select the printer you wish to use before you can print from the Linux command line. You may use the lpstat command to accomplish this. Run the following command in an open terminal window to see a list of all accessible printers:
-a lpstat
A list of printer names will appear after using this command. You’ll need it for the next stages, so make a note of the one you wish to utilize.
2. Installing Printer Drivers
You might need to install the necessary printer drivers in order to guarantee that your printer functions properly. A variety of printer drivers are pre-installed on many contemporary Linux distributions, however you may need to download and install extra drivers for some specialized or more recent printers.
On the website of the manufacturer, you may look for the drivers particular to your printer model. After downloading the drivers, adhere to the given installation guidelines.
3. Setting Up Your Printer
You must configure your printer for printing after you’ve located it and installed the required drivers. Printer configuration may be done with the lpadmin command. Three things are required: the printer’s model, name, and URI (Uniform Resource Identifier). This is how a printer may be added:
sudo lpadmin -p <printer-name> -E -v <printer-URI> -m <printer-model>
Replace <printer-name>, <printer-URI>, and <printer-model> with the appropriate values for your printer. For example:
sudo lpadmin -p MyPrinter -E -v socket://192.168.1.10 -m laserjet
This command adds a printer named “My Printer” with the URI “socket://192.168.1.10” and a printer model of “laserjet.” The -E flag enables the printer.
5. Printing Text Files
To print a simple text file from the command line, you can use the lpr command. Here’s the basic syntax:
lpr <file-name>
For example, to print a text file named “mydocument.txt,” use:
lpr mydocument.txt
This command will send the file to the default printer. If you want to specify a different printer, use the -P flag followed by the printer name:
lpr -P MyPrinter mydocument.txt
Replace “MyPrinter” with the name of the printer you want to use.
5. Printing PDF Files
Printing PDF files from the command line is comparable to printing text files; however, for enhanced PDF support, use the lp command. How to print a PDF file is as follows:
lp <file-name>
For instance, to print a PDF file named “mypdfdocument.pdf,” use:
lp mypdfdocument.pdf
Just like with text files, you can specify a different printer by using the -d flag:
lp -d MyPrinter mypdfdocument.pdf
6. Printing Images
It can be a little more difficult to print photographs from the command line as you have to convert them to a workable format. An picture can be converted to PostScript format using the convert command from the ImageMagick package, and then printed using lpr. Here’s one instance:
convert <image-file> <output-file.ps>

lpr -P MyPrinter <output-file.ps>
Replace <image-file> with the path to your image file and <output-file.ps> with the desired PostScript file name. Then, specify the printer with the -P flag.
7. Managing Print Queues
Linux provides several commands for managing print queues and monitoring print jobs:
lpq: Check the print queue status, including job IDs and their status.lprm: Remove a print job from the queue using its job ID. For example, to remove job ID 5, uselprm 5.cancel: Cancel a print job using its job ID or the name of the printer to which the job is sent.
Use these commands to maintain control over your print jobs and troubleshoot any issues that may arise.
Conclusion:
We demonstrated the various command-line options for printing a document. Since most Linux distributions include the CUPS printing layer as the default printing solution, we used it. Any actual printer will function as long as the appropriate driver is present and it supports CUPS communication, even if the tutorial utilizes a virtual printer.
Get more information about
How To Use Bash History Commands and Expansions on a Linux VPS